
Necessity is the mother of invention. I came up with this idea after deciding I really wanted some fridge magnets, but a.) didn't know where to find them and b.) have been trying to make a promise to myself to make anything I can to save money, and most importantly, using things I already have in my craft stash.
Everything I used for these I already had, including the magnets. I recently purchased a new dry erase board for my studio space and it came with all types of things for mounting, including two long magnet strips. Cut those babies into small pieces and you've got enough for 10+ fridge magnets. Score! If you don't have anything like that, you can buy all different types from the craft store for pretty cheap. As for the cardboard, I used the cardboard mailers from USPS. It's a great way to recycle if you get one in the mail (just make sure you only use the bits that aren't wrinkled or mangled!) or, you can get them for free from your local post office. Ok, let's get to the how to!
MATERIALS NEEDED :
- A Cardboard mailer.
- Mod Podge in Gloss
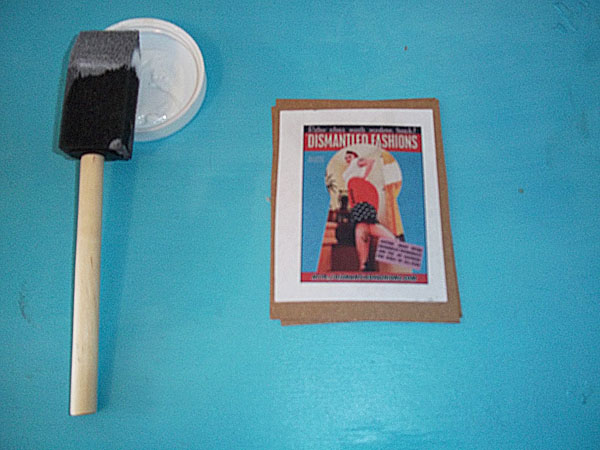
- Sponge Brush
- Small Magnet
- Image of your choice*

* You can use magazine clippings, your own art, printed images from your computer (I recommend making sure it's printed at 300dpi for quality) or anything you can imagine. For best results though, don't use a paper that is very thick, such as actual photographs. Just print a copy on regular paper :)

Roughly cut out your image and three pieces of cardboard about the same size. You don't have to be perfect or exact, because at the end you'll clean up the edges.

Glue all three pieces of cardboard together only at this step together by putting a layer of Mod Podge on each piece. Make sure as you're going that a cardboard color side is on top at all times. This is so when you go to put your image on, there will be no writting from the mailer showing through. Plus, it sticks together better this way. It's going to curl a bit as you can tell, but it's ok. Just lay the pieces flat on your table and smooth them flat as you go. Allow this to dry before you move on.
Then, put a thin but full coverage layer on the back of your image and carefully smooth it onto your cardboard stack. Be careful of bubbles, and use care so you don't rip or smudge your picture. The glue makes it all wet and fragile, so just be aware! Let this dry before moving on.

Carefully put a thin,even coat of Mod Podge on top. Go in one direction only, and don't use too much. Try not to go over the same spot more than once as your picture's ink may start to smear. Don't worry about the fact that its white, it dries clear :) Let this dry completely.
There's no picture of the next step, as it would look exactly like the last one. All you need to do now is once your first coat is completely dry, start adding a second and third coat. You can add more if you feel like it needs it, it's up to you. You can go over it more than once now, as the colors are set and won't budge. Do let it dry a bit in between coats though. Make sure every coat is even and thin for a really nice glossy finish.
Then, when you're satisfied with the finish. Let dry again. Wait till it's verrrry dry before you go on, or you'll be met with a gummy gross mess! When it's hard to the touch, you'll know you're ready. Cut your picture out. Now you'll see why we waited to do this... super clean edges! Admire your work so far and feel proud.


All that's left is to glue on a magnet to the back. You can use the Mod Podge for this step too, it holds fine!
That's it! You're done. Your magnet is ready to use once it's dry. After a few days of curing, it'll become completely hard.
Here are a few more I made for myself. As you can see from the PBR ad, you can cut out shapes too. I'd reccommend keeping the shapes simple though, as these are pretty thick to cut through!

If you make some, I'd LOVE to see pictures! Hope you enjoyed.
xo Emily
No comments:
Post a Comment